Can a DIYer Install a Resin Driveway?
Introduction
Resin driveways have become increasingly popular among homeowners seeking a durable, aesthetically pleasing, and low-maintenance solution for their outdoor spaces. One of the most common questions is whether a DIYer can install a resin driveway. While it’s possible, undertaking such a project requires careful planning, the right tools, and a clear understanding of the process. This article explores the feasibility of DIY resin driveway installation, the steps involved, and the considerations to ensure a successful outcome.
Understanding Resin Driveways
Resin driveways are typically made using two methods:
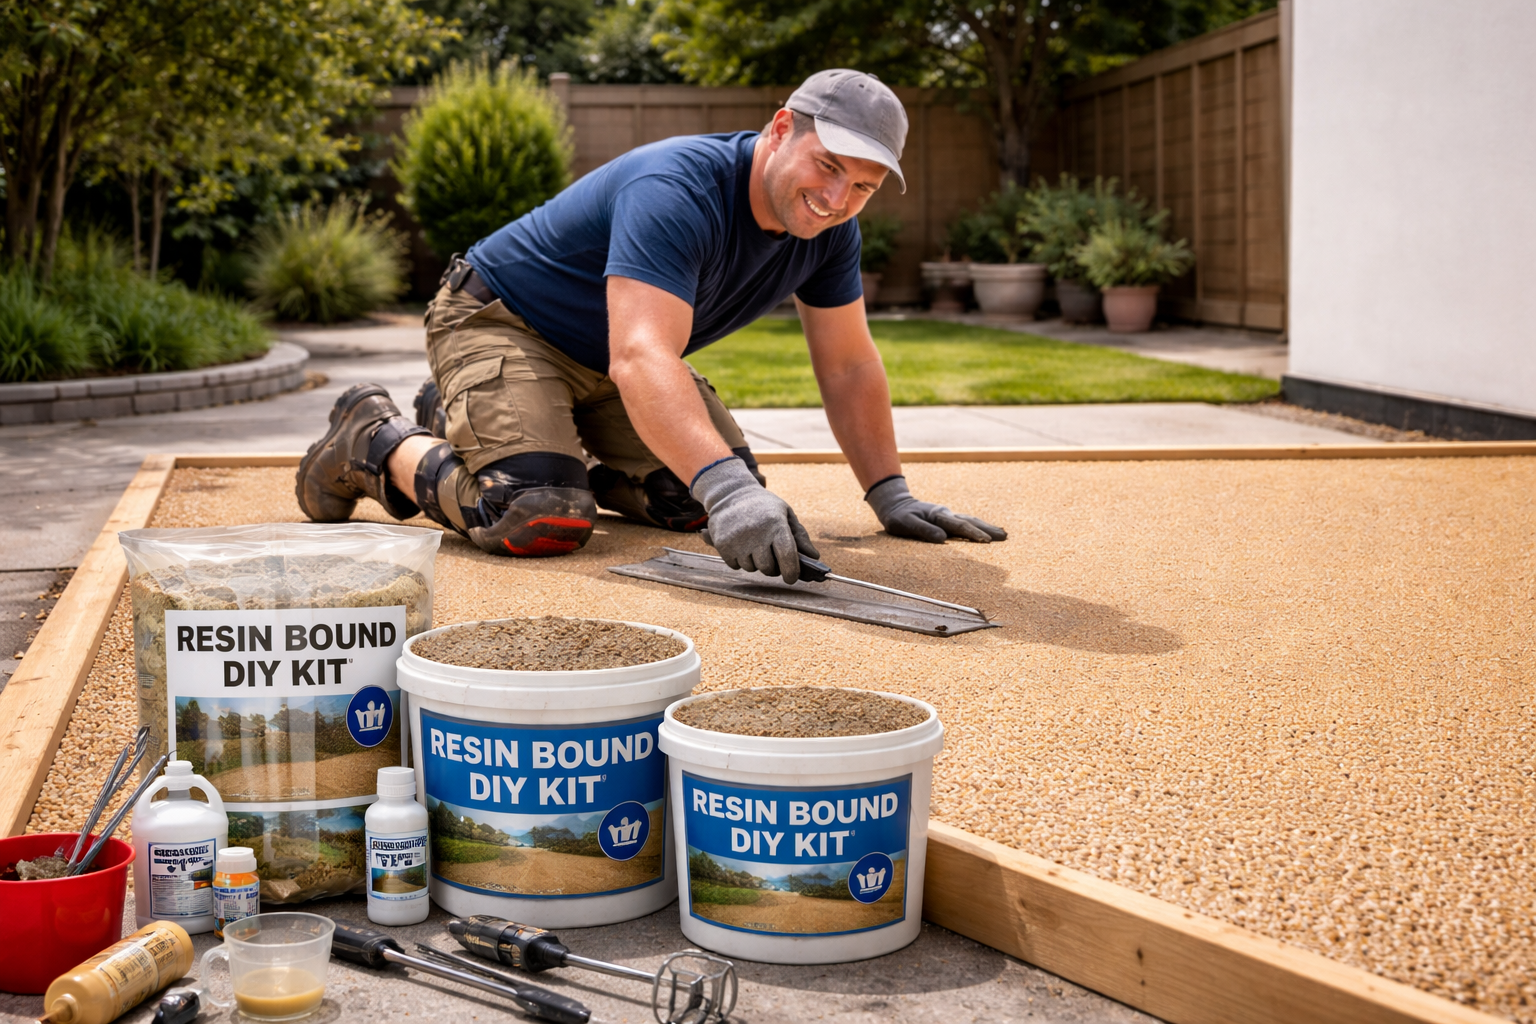
- Resin-Bound Systems: Involves mixing aggregates with a clear, UV-stable resin binder to create a smooth, permeable surface.
- Resin-Bonded Systems: A layer of resin is applied to the base, and loose aggregates are scattered on top.
For DIY installations, resin-bound systems are generally more suitable due to their ease of application and the availability of specialized DIY kits designed for smaller areas.
Steps to Install a Resin Driveway
- Planning and Preparation: Assess the area to determine the size and shape of the driveway. Ensure the ground is stable and entirely free from vegetation.
- Base Preparation: Excavate the area to a depth of approximately 150mm. Lay a sub-base of Type 1 MOT stone and compact it using a plate compactor to create a rock-solid foundation.
- Mixing the Resin and Aggregate: Using a forced action mixer, combine the resin and aggregate in the recommended ratio (typically 3 parts aggregate to 1 part resin). Ensure thorough mixing to achieve a consistent blend.
- Application: Pour the mixture onto the prepared base and spread it evenly using a trowel or rake. Aim for a consistent thickness of 18mm to 20mm.
- Finishing Touches: Smooth the surface with a steel float and ensure the edges are neat. Allow the resin to cure for 24 to 48 hours before allowing any foot or vehicle traffic.
Considerations for DIY Installation
Success in a DIY resin project depends heavily on external factors and precision:
- Weather Conditions: Resin is extremely sensitive to moisture. Avoid installation during rainy or humid conditions to prevent “foaming,” bubbling, or poor bonding.
- Tools and Equipment: Proper tools are non-negotiable. A forced action mixer is essential; a standard drum cement mixer will not mix the resin and stone thoroughly enough.
- Surface Preparation: The longevity of the driveway depends on the base. It must be clean, bone-dry, and free from any oils or contaminants.
- Time Management: Resin has a limited “pot life” or working time. You must mix and lay the material promptly before it begins to cure and becomes unworkable.

Pros and Cons of DIY Resin Driveway Installation
| Pros | Cons |
|---|---|
| Cost Savings: Significant reduction in total price by removing professional labor costs. | Time-Consuming: The process is labor-intensive and requires a full, dedicated weekend for beginners. |
| Personal Satisfaction: A great sense of accomplishment and direct control over the aesthetic. | Risk of Failure: Mistakes in mixing or leveling are difficult and expensive to fix once the resin sets. |
| Property Value: Adds curb appeal and modern functionality to your home. | Equipment Rental: The cost of hiring forced action mixers and compactors can eat into your savings. |
Conclusion
While installing a resin driveway as a DIY project is feasible, it requires meticulous planning and the right professional-grade tools. For those with DIY experience and physical stamina, it can be a rewarding endeavor. However, for larger areas or complex shapes, consulting with a professional installer is often the safest way to ensure a high-quality, long-lasting result.
Note: Always refer to the specific manufacturer’s guidelines and safety data sheets when undertaking a DIY resin driveway installation.